Deploying to Pinata
Introduction
In this 5 step guide, we'll walk you through how to deploy your Polywrap wrap to Pinata so that other apps could integrate it into their apps!
Table of Contents
Click to expand
What is Pinata?
Pinata is building the largest pinning service on IPFS!
Pinata gives users the ability to upload, manage, and share their content whenever, wherever and, with whomever they want.
What you need to get started:
- We'll be using the Polywrap Demos repo for this guide.
- 💚 Node. js
- 🪅 Pinata
- 🐳 Docker
- 🧶Yarn
- Versions:
node >=10.0.0oryarn >=1.0.0
- Versions:
- 🔸 Git
Step 1. Clone the polywrap demo project
git clone https://github.com/polywrap/demos.git
Step 2. Git pull metadata
Then, we will check out the demo branch with the metafiles already set up:
git pull origin polywrap-metadata
Step 3. Build the wrap
Now, we can build the sample wrap with the following commands:
nvm use
yarn
yarn build
Your build folder should be generated now. Copy and paste the ./polywrap.meta.yaml and ./meta files into the build folder.
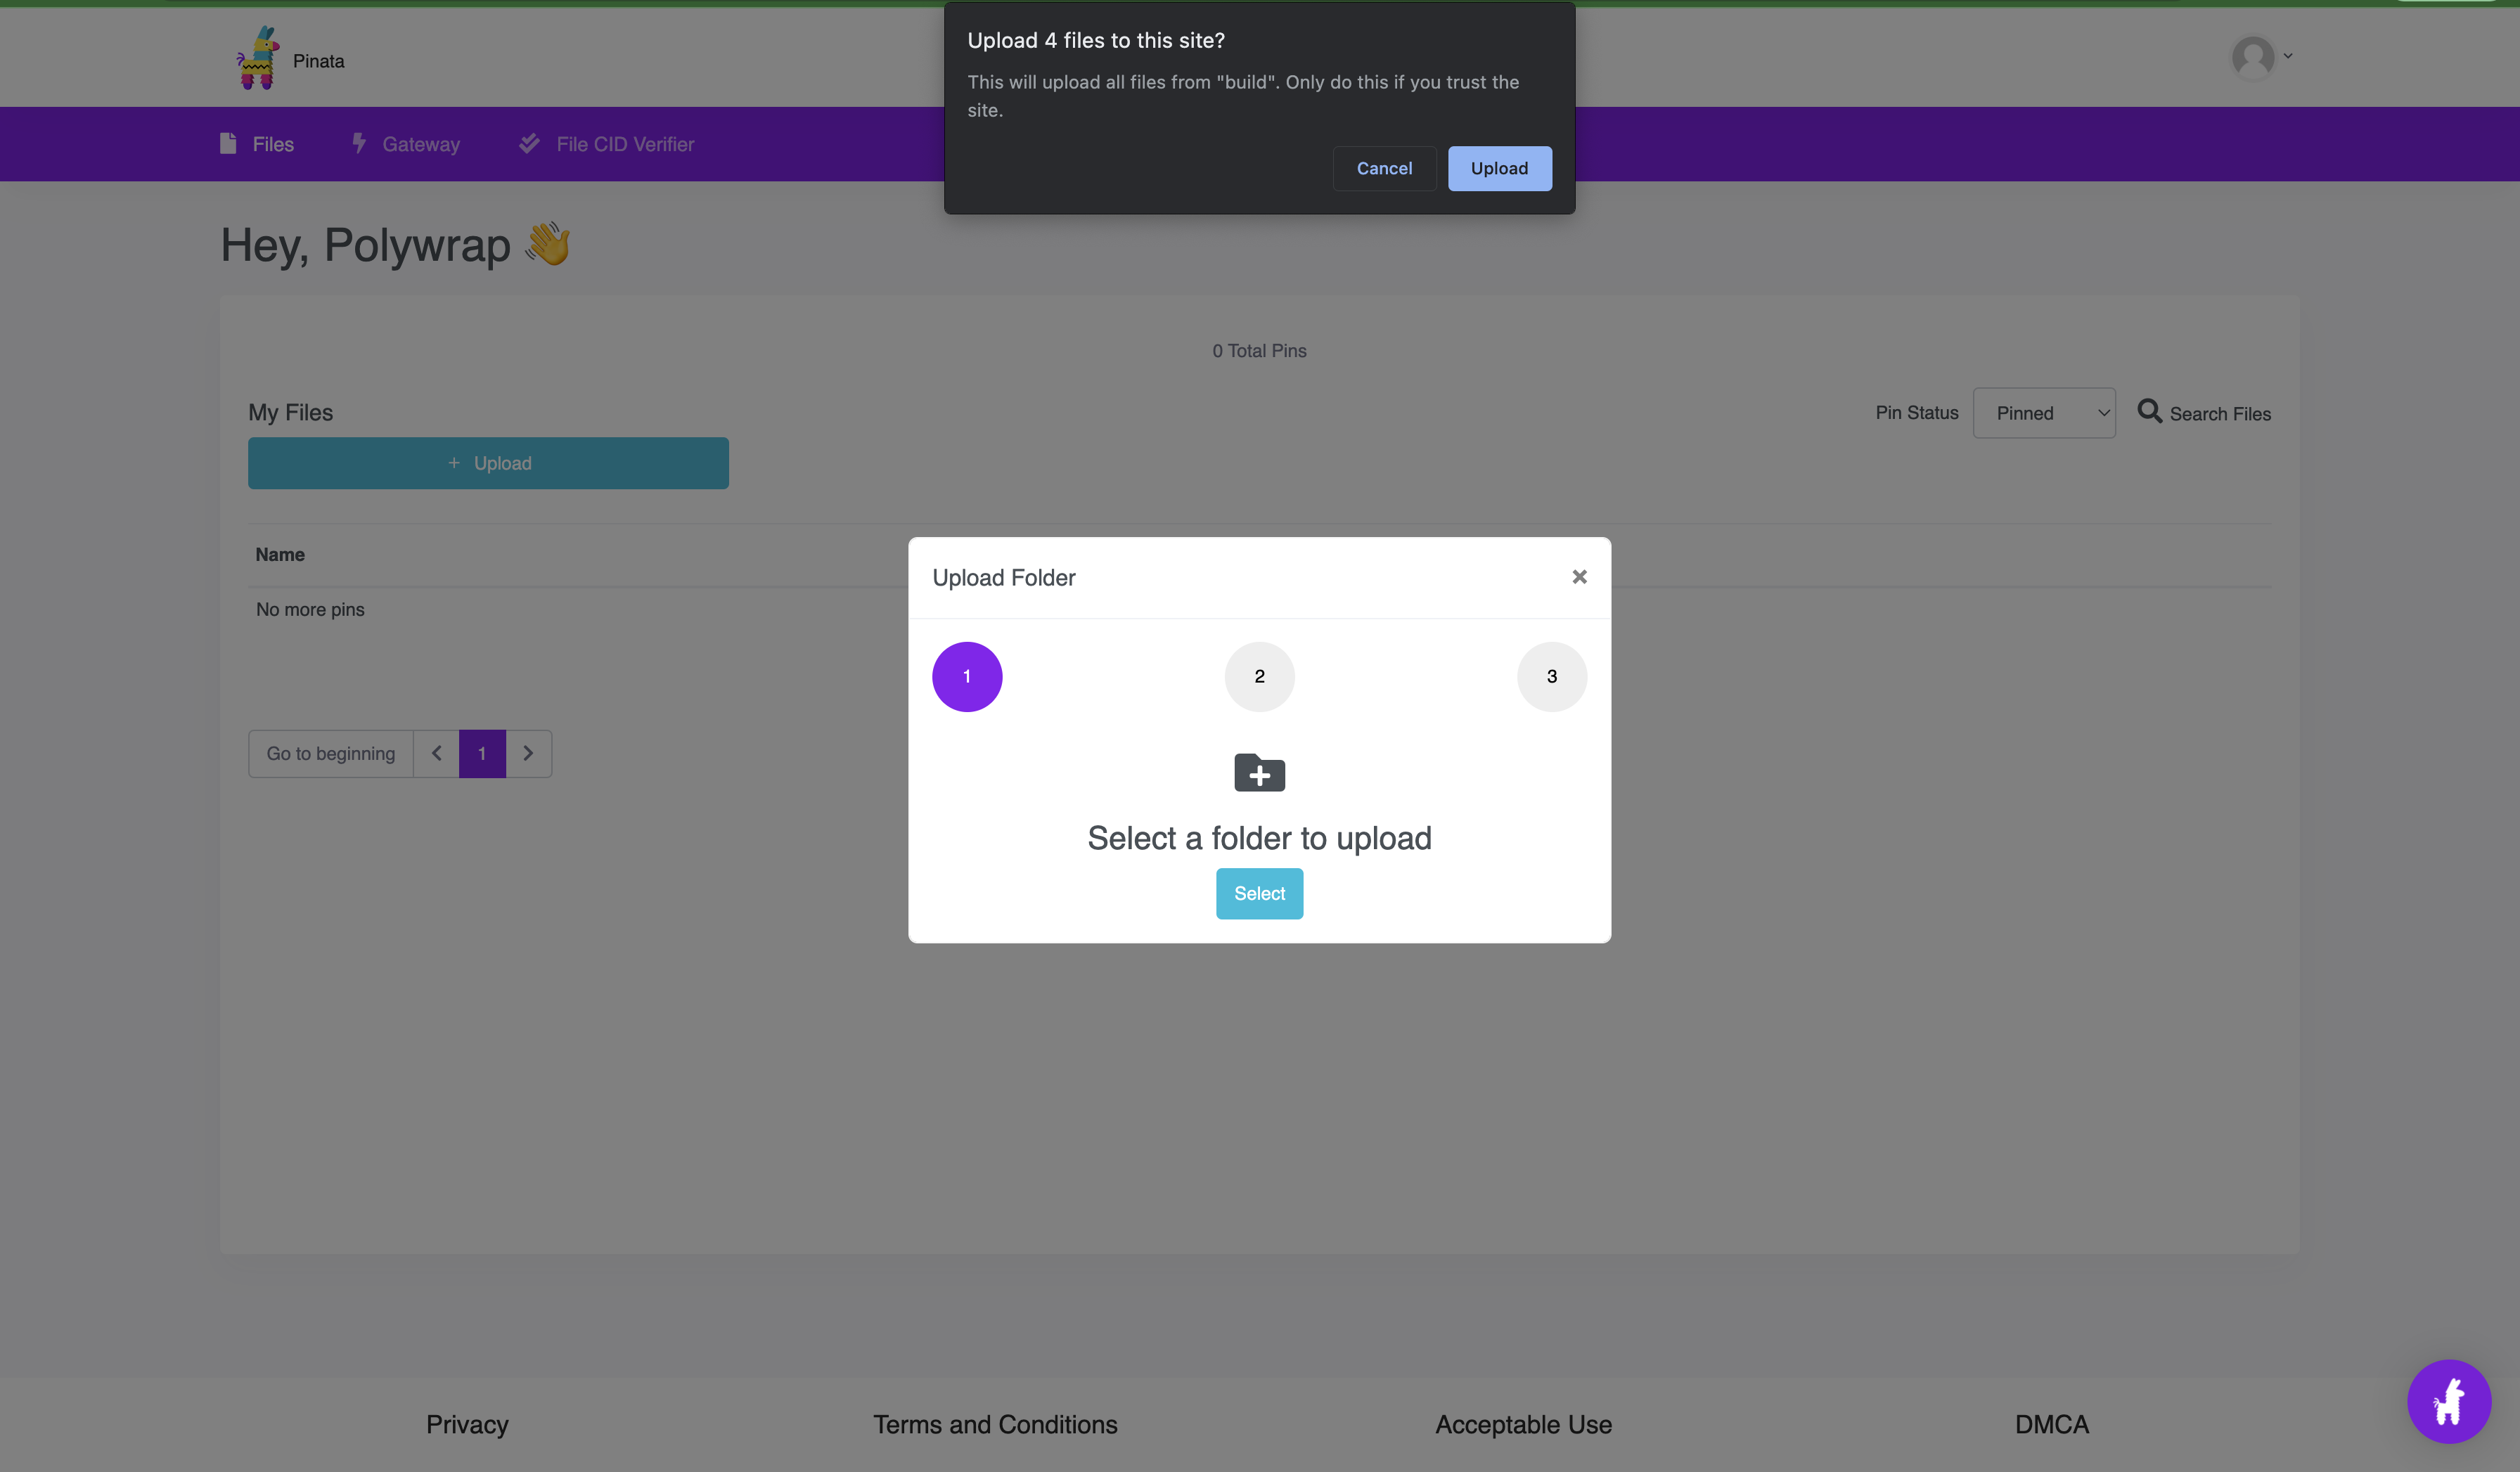
Step 4. Upload the build folder to Pinata
Make sure you signup for a Pinata account.
- Click
"Upload"
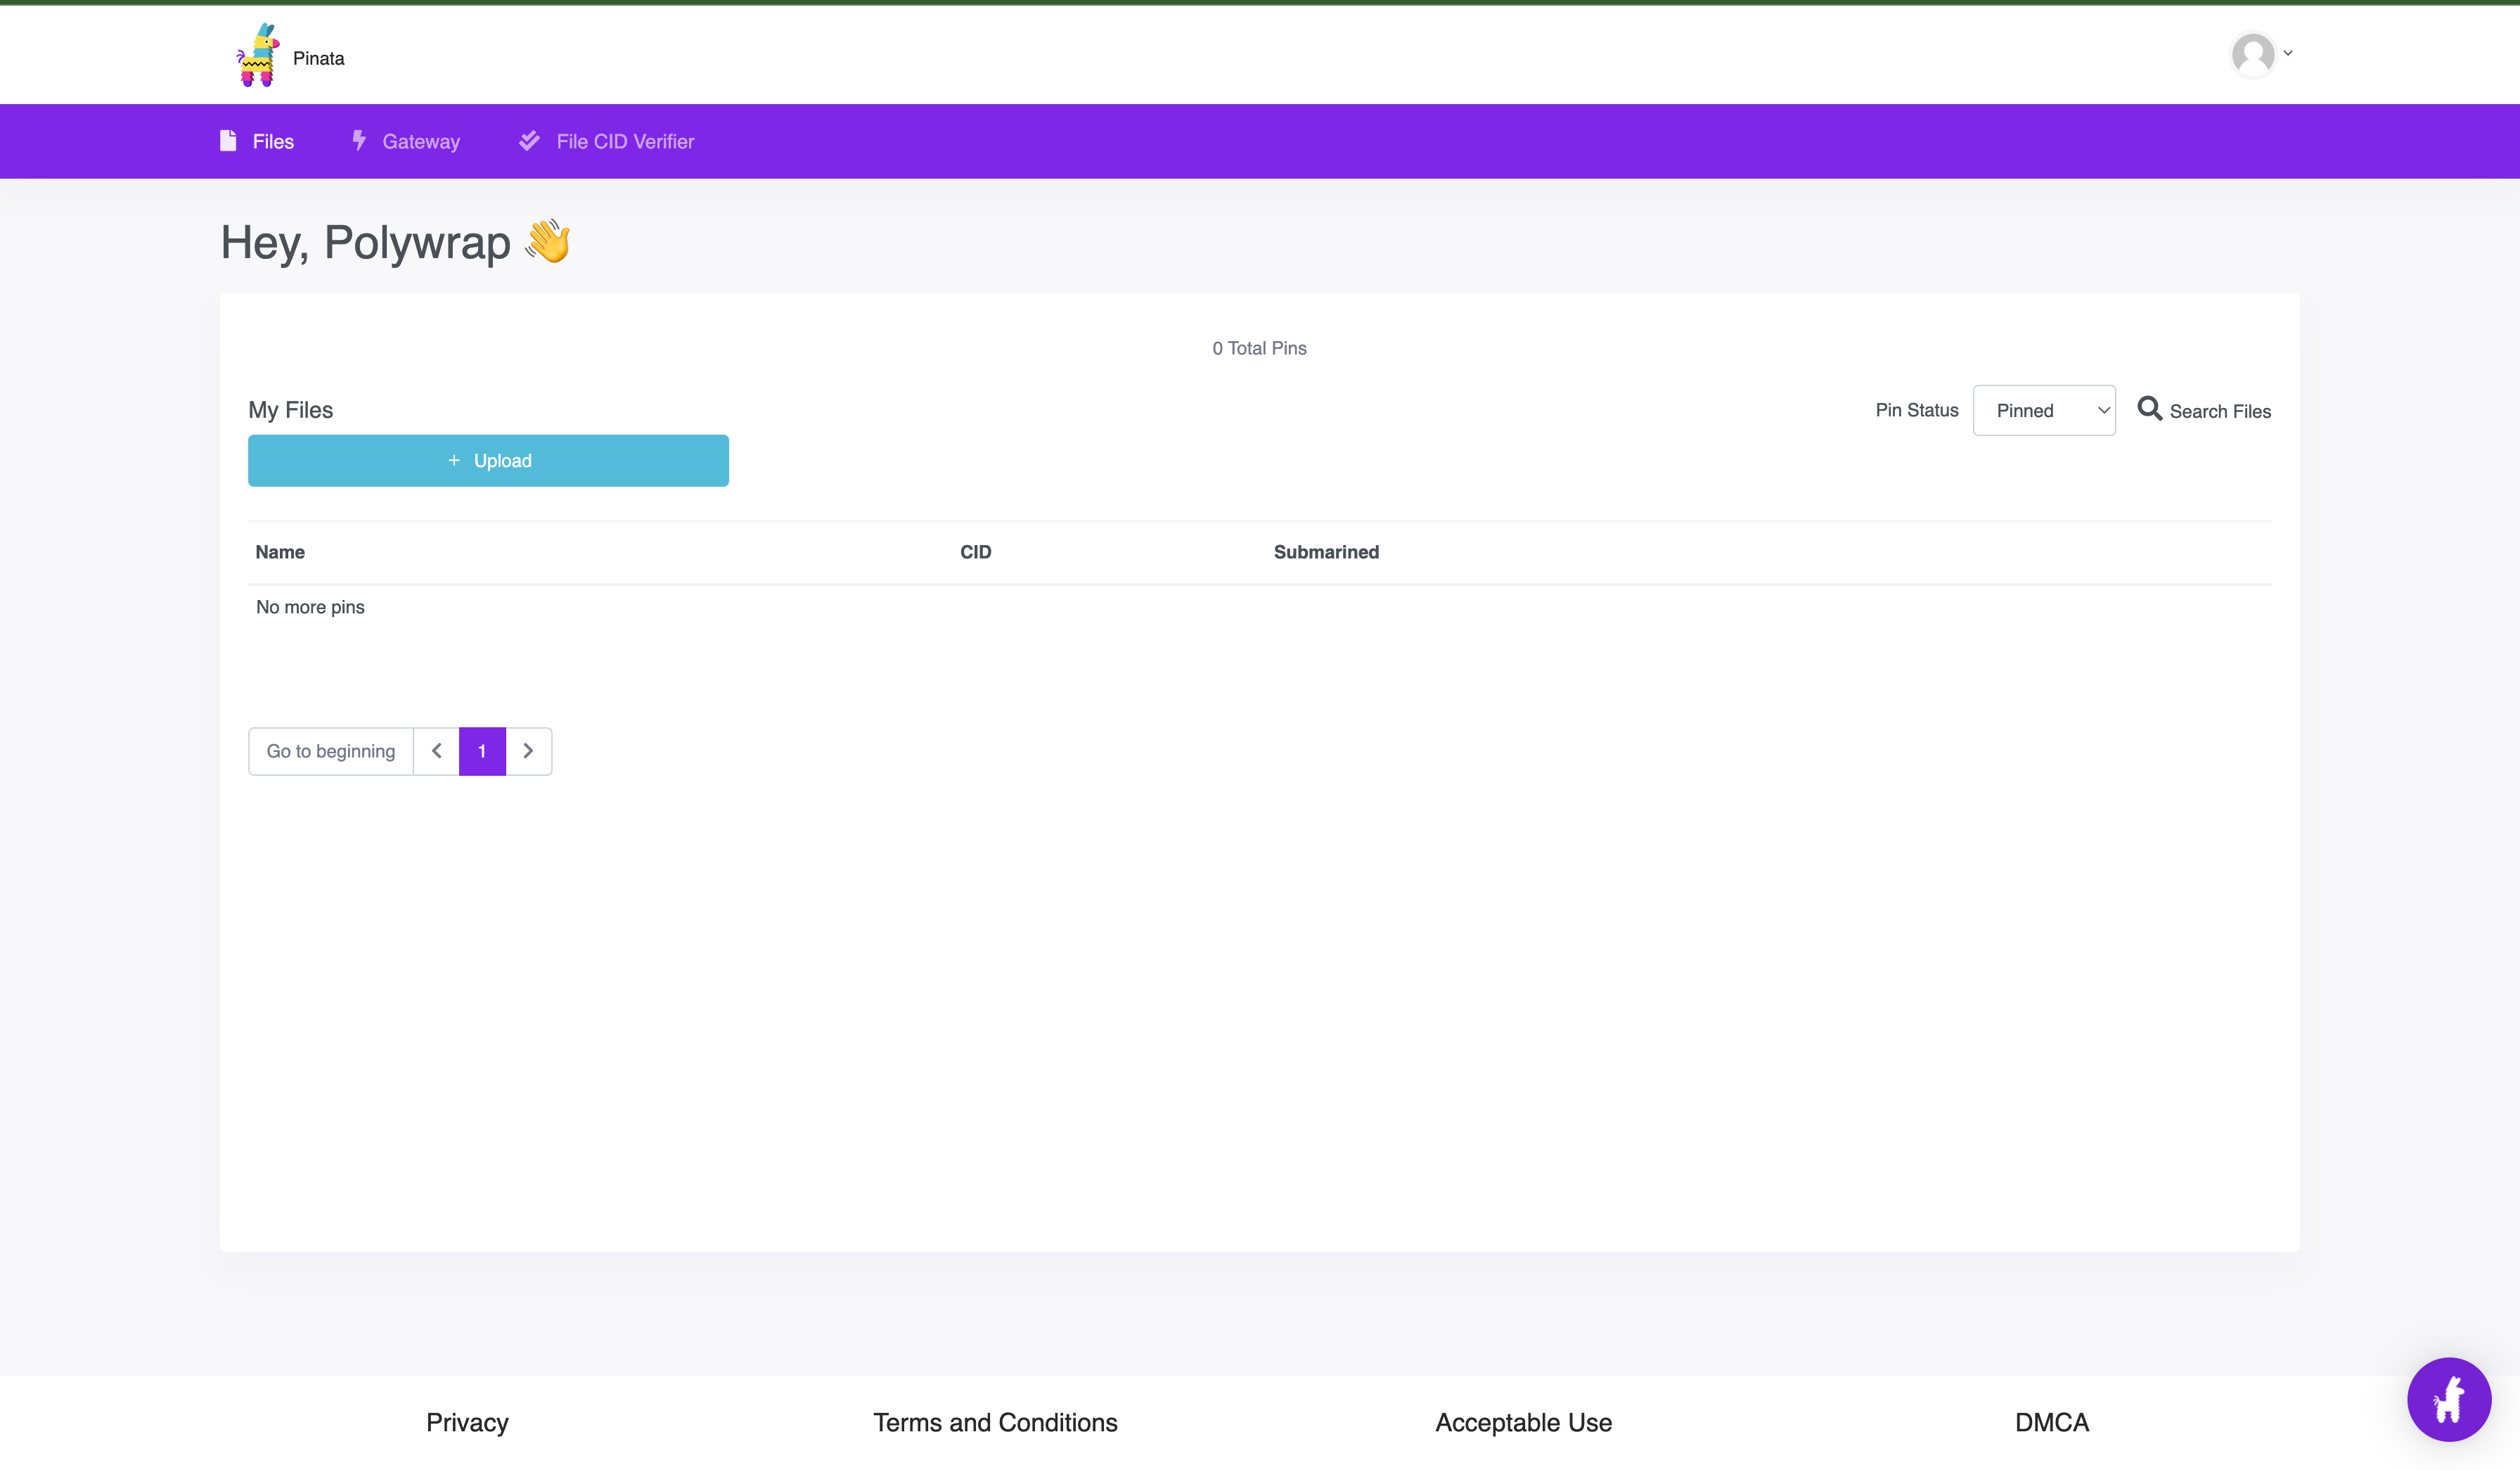
- Click
"Folder"
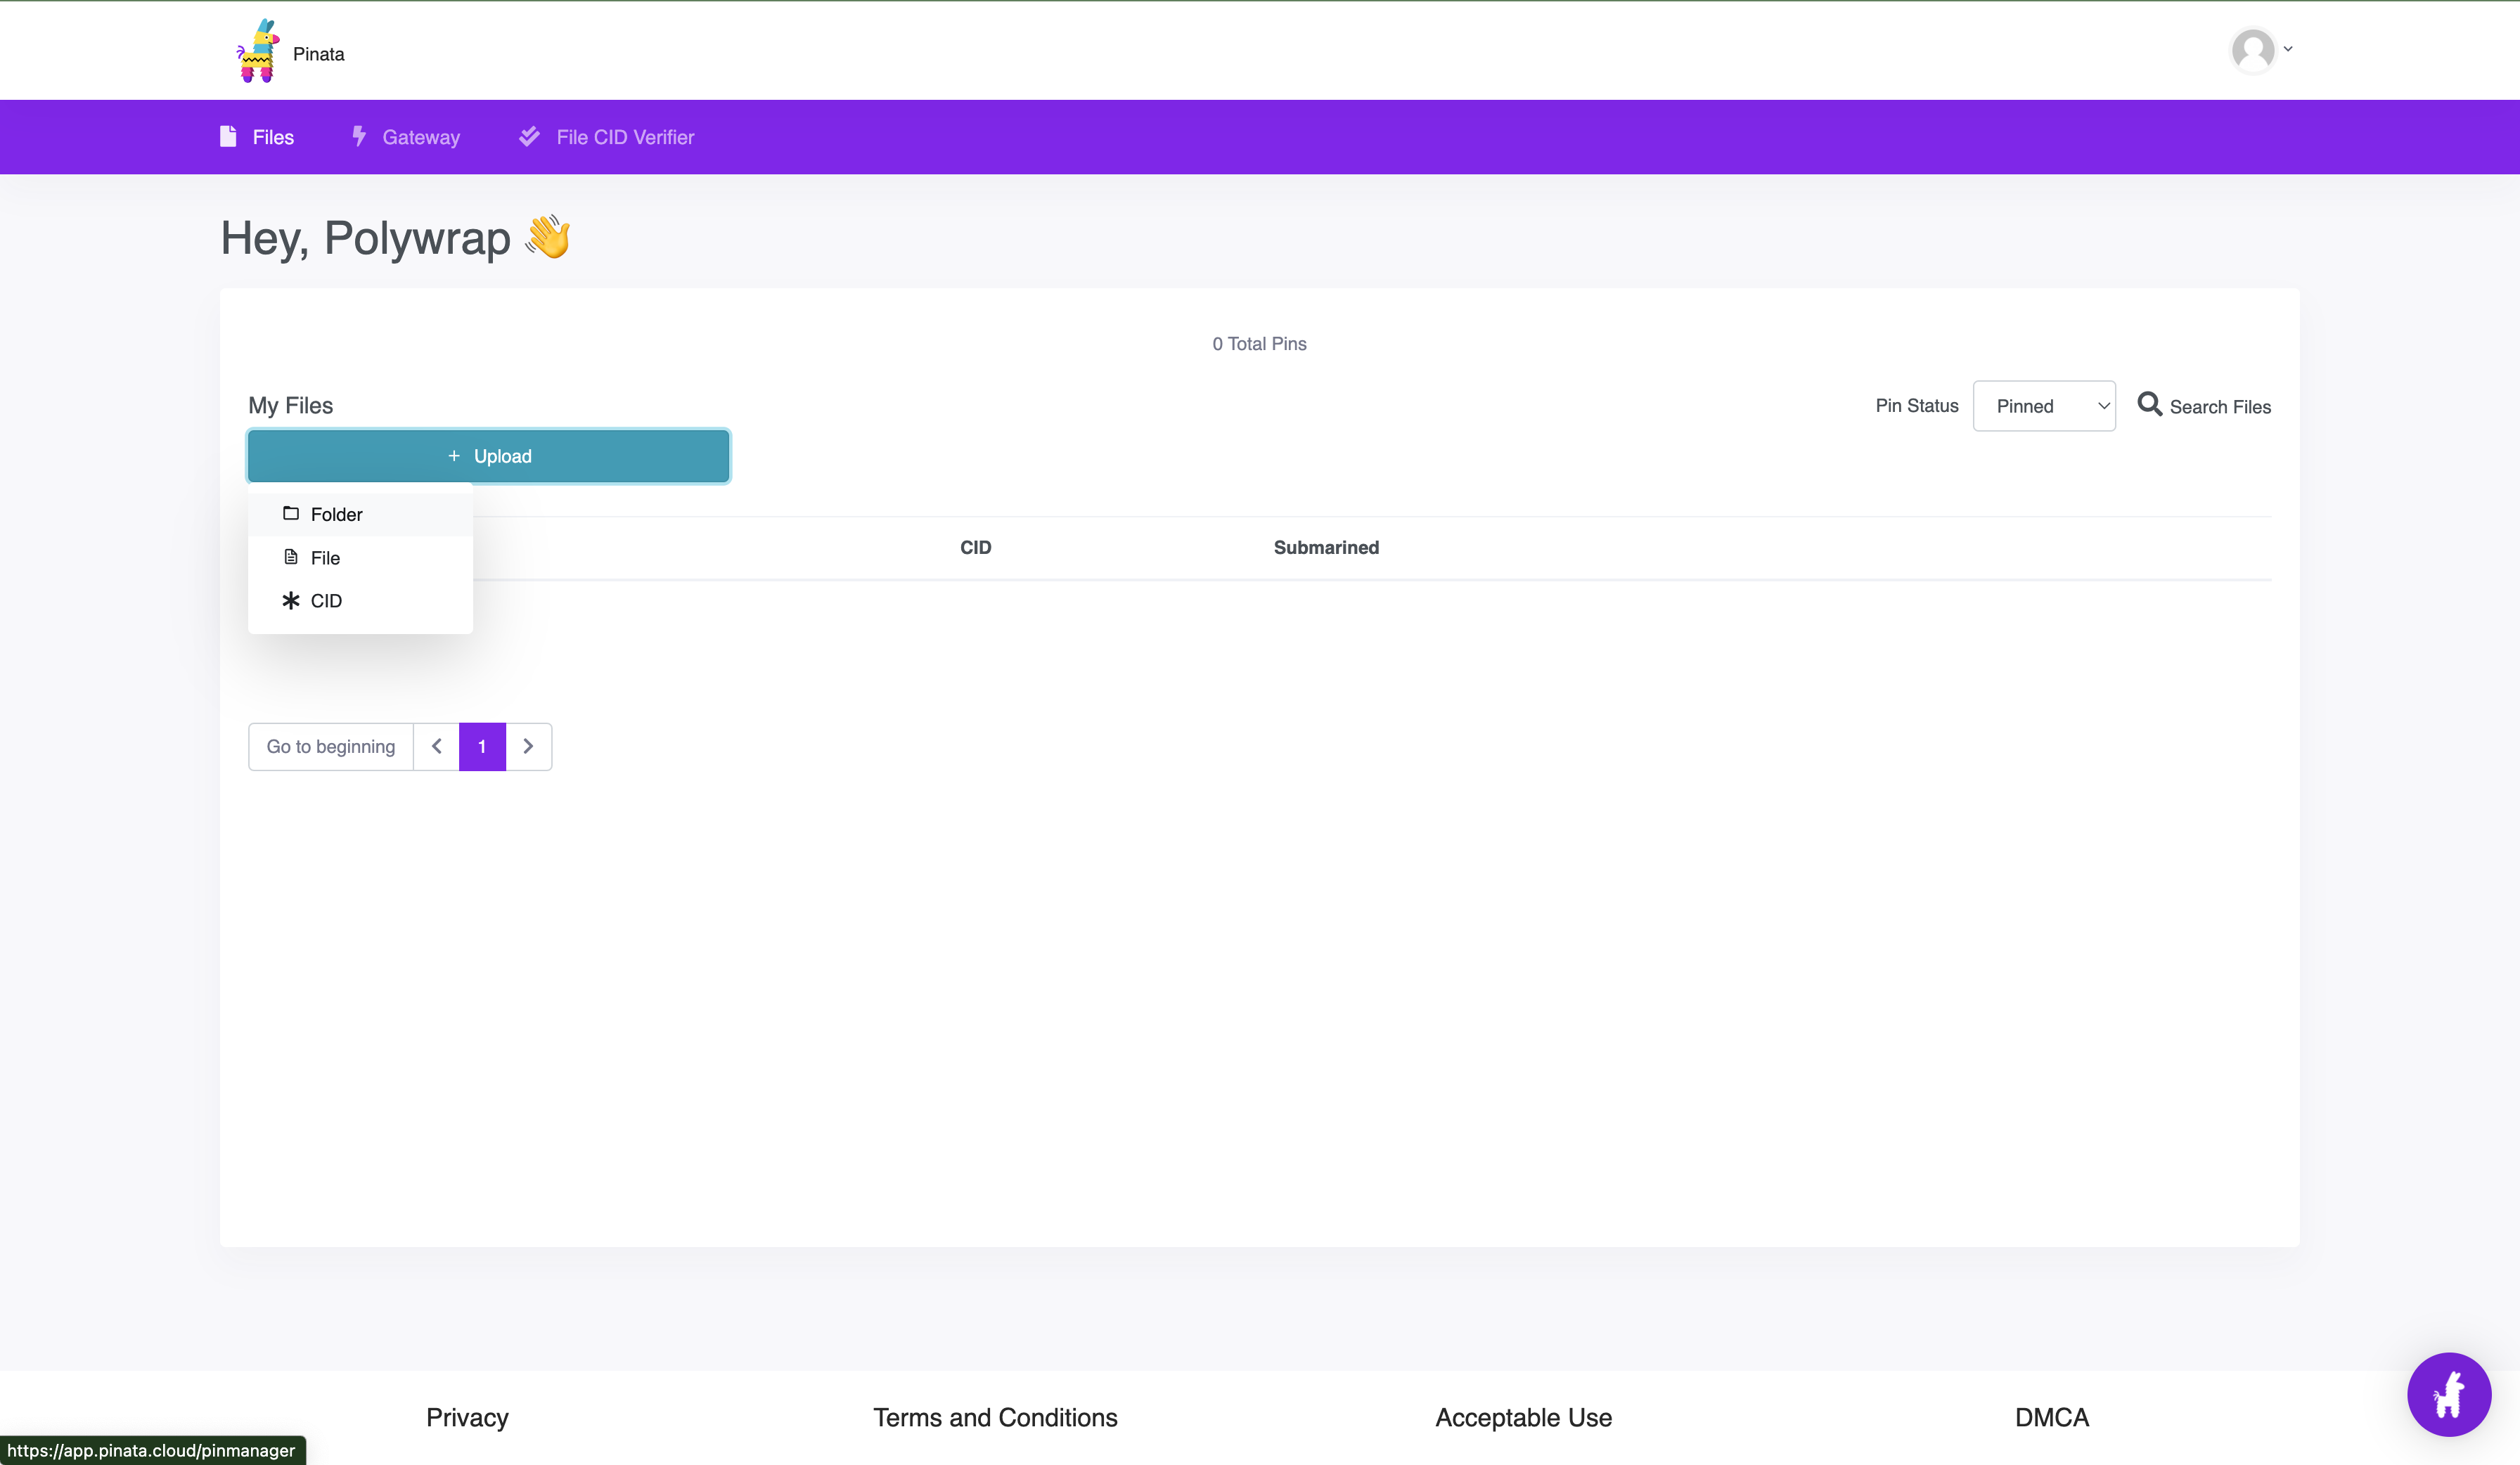
- Click
Selectfor a folder to upload should be the build folder
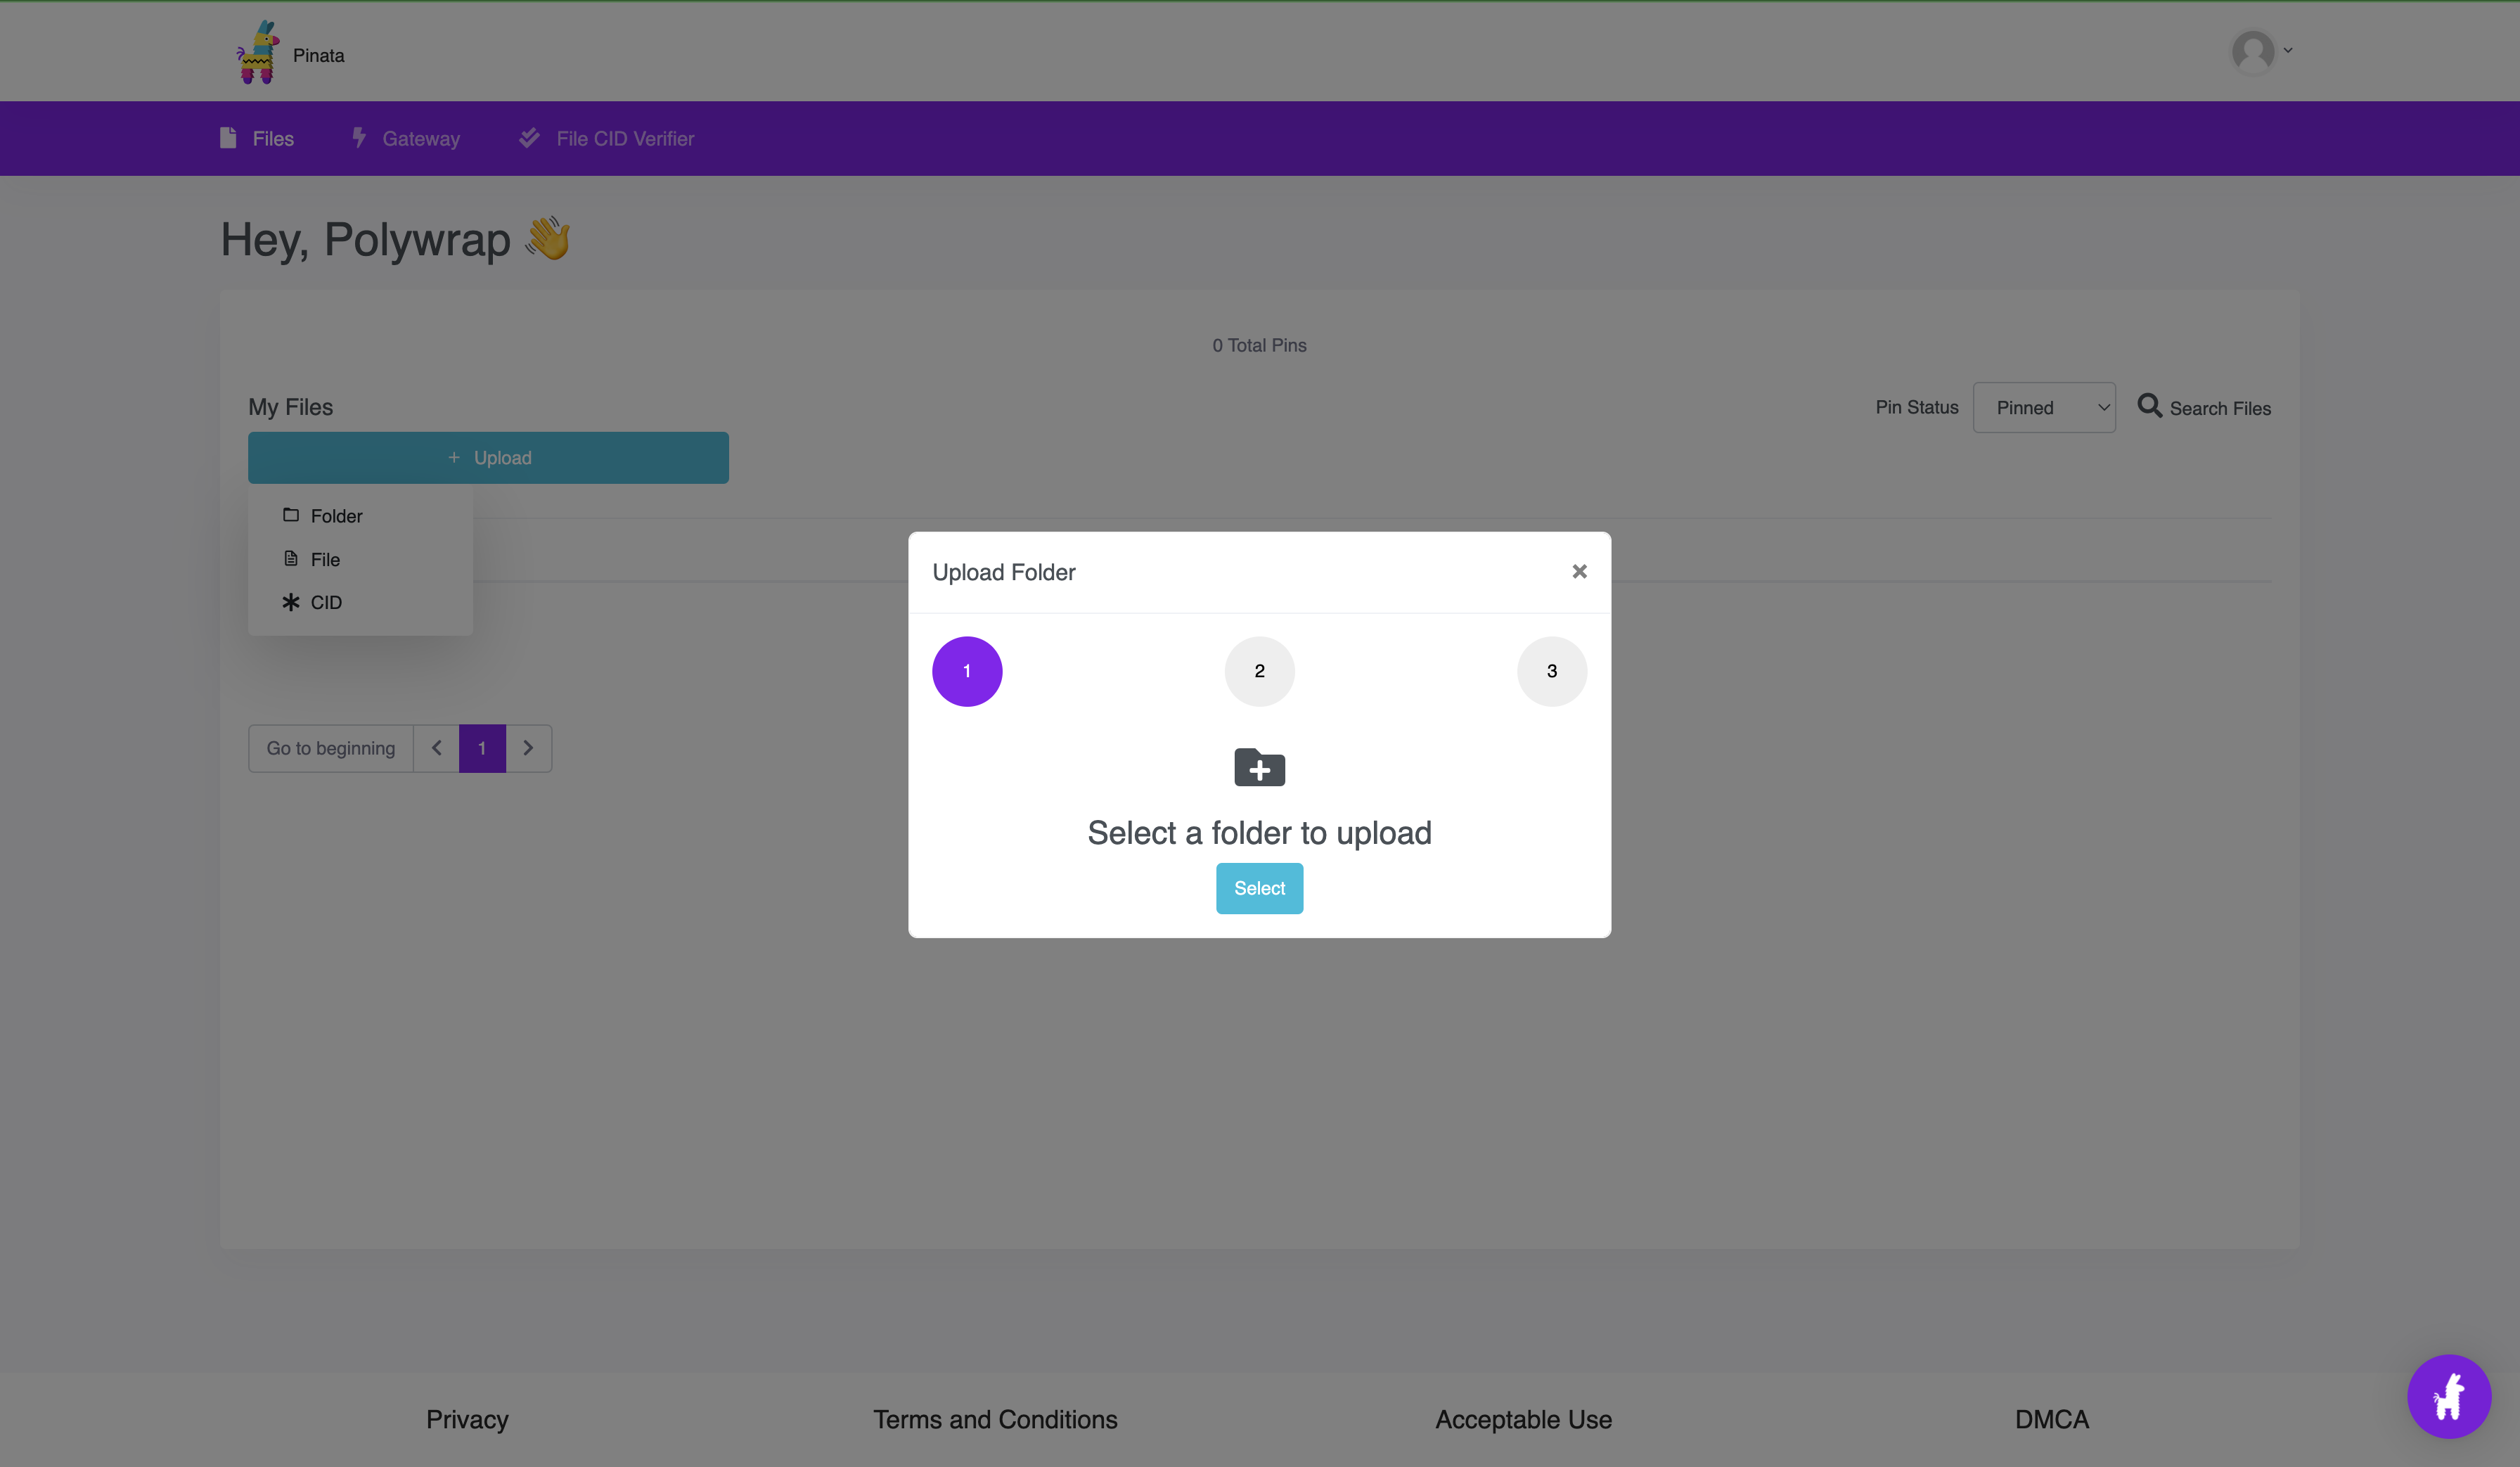
- Give your file or folder a name. Example: Gm-Polywrap
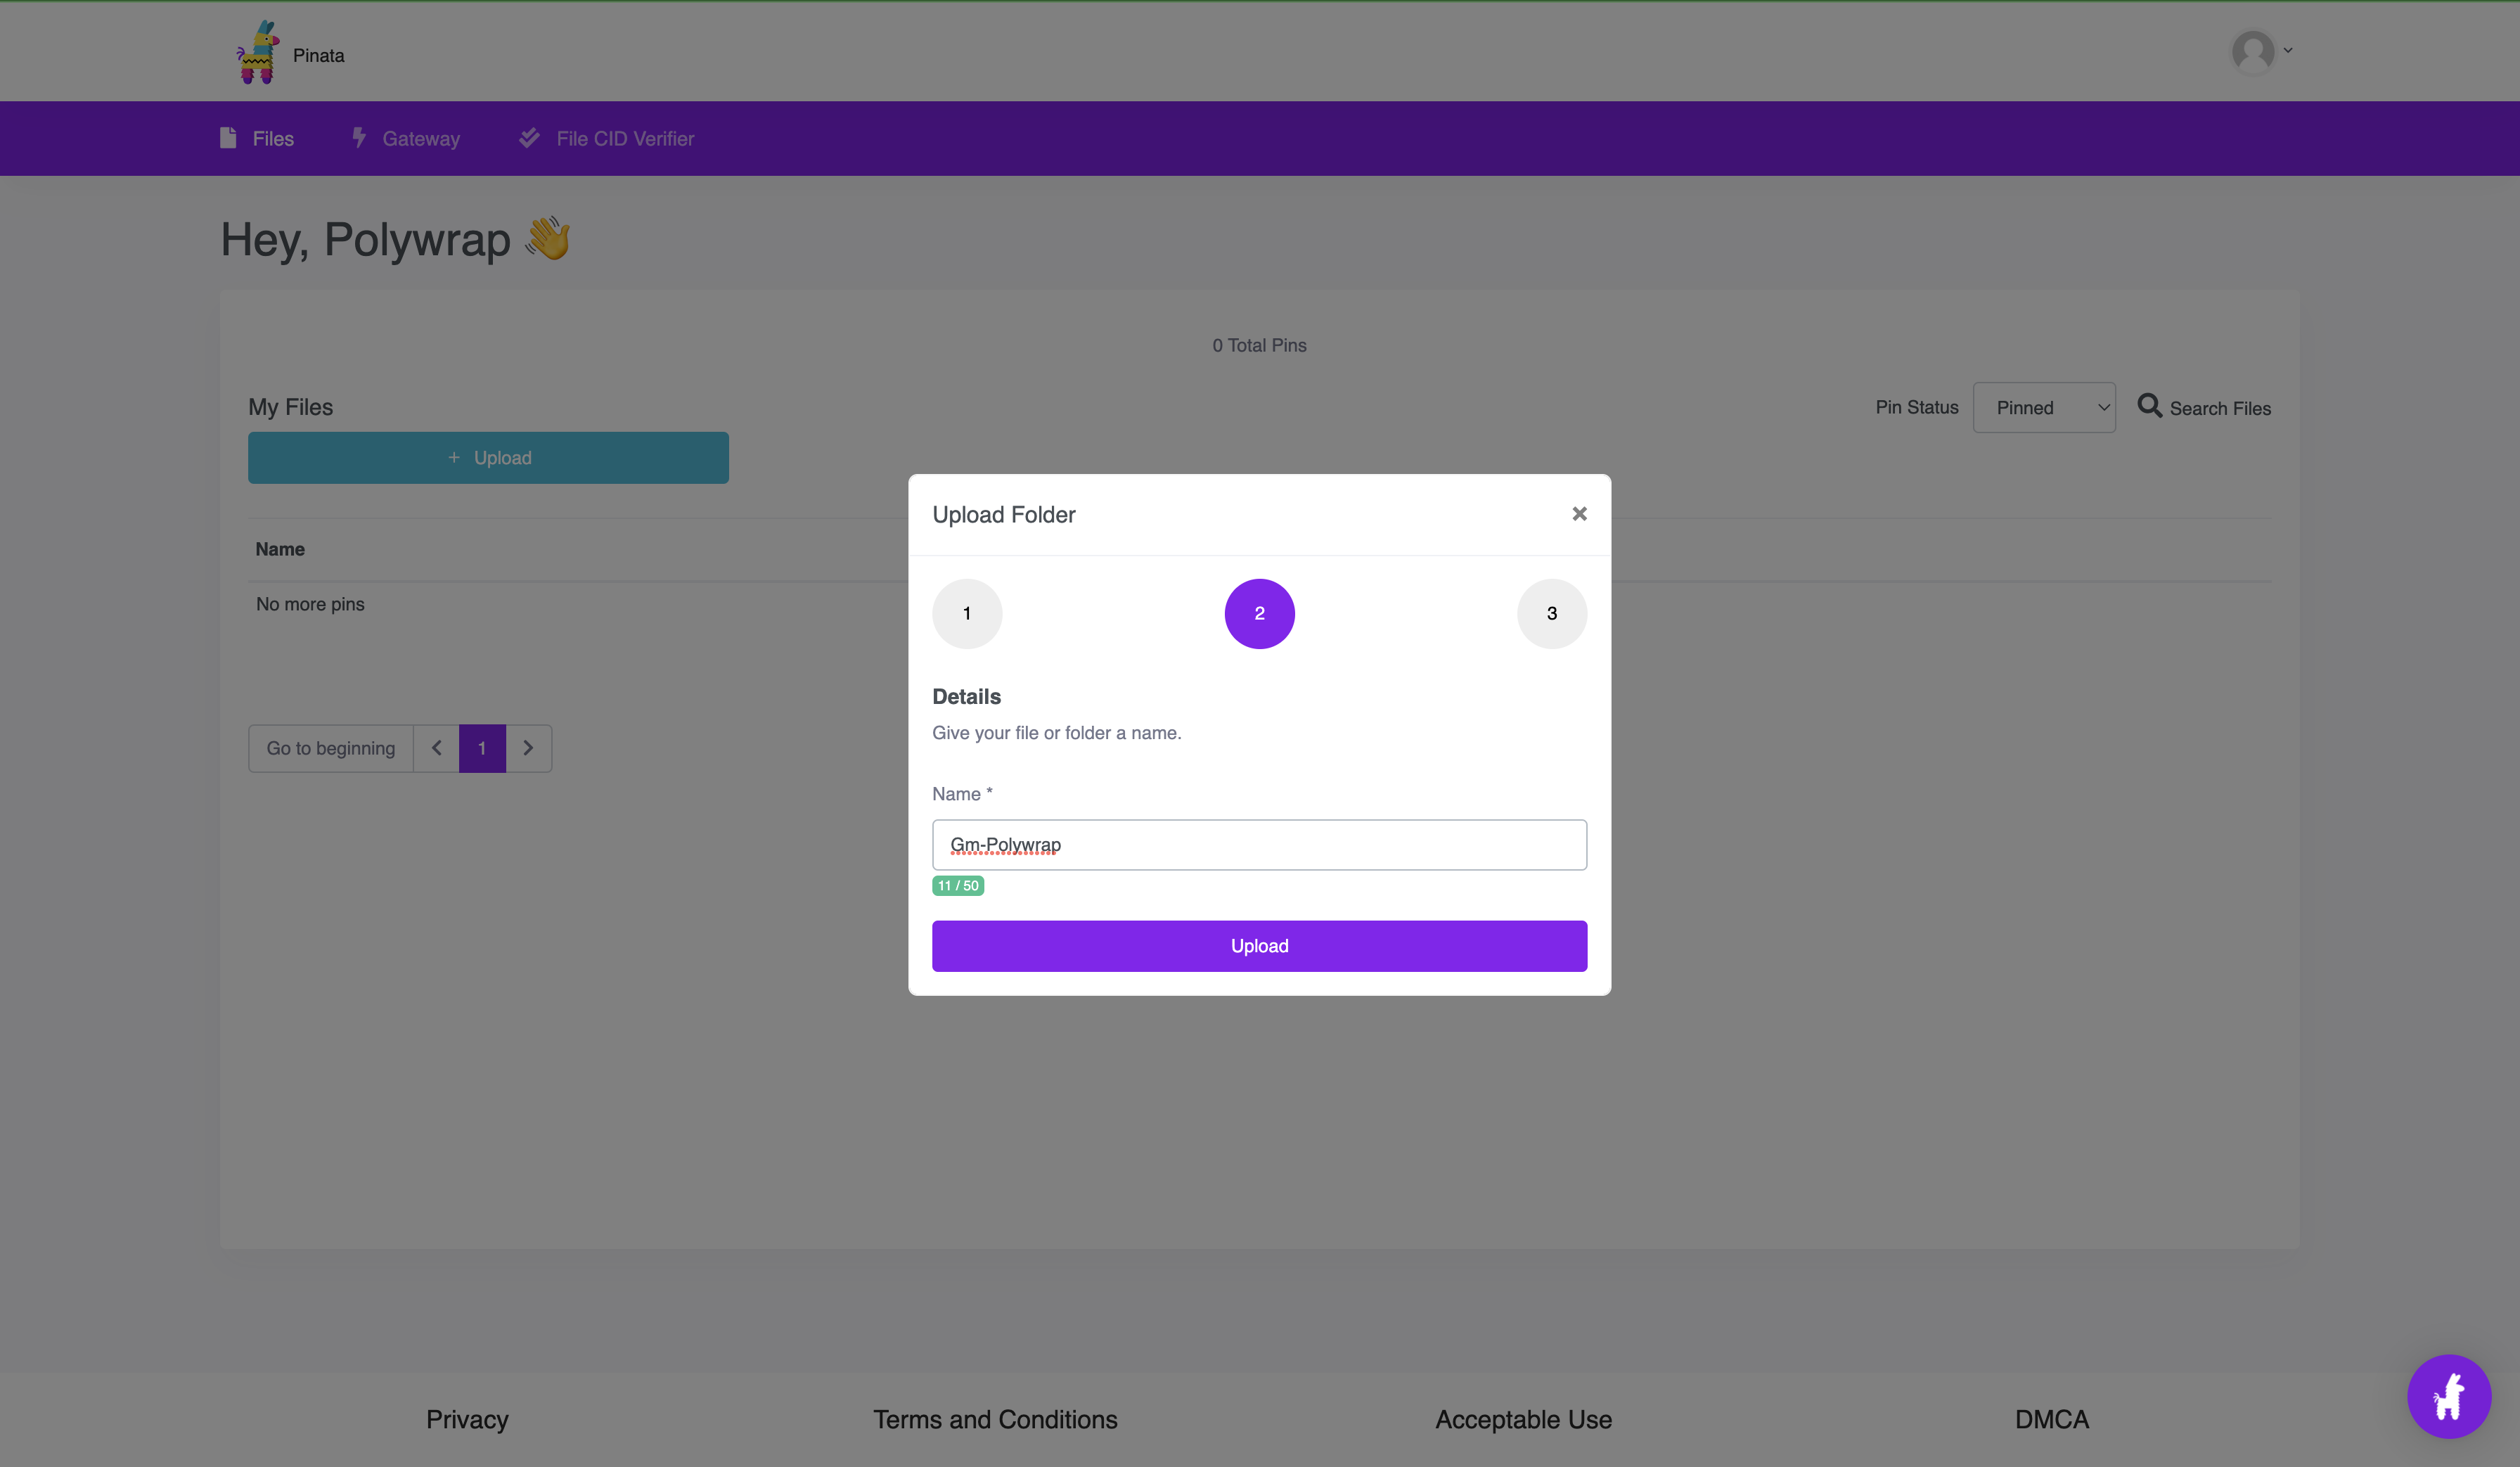
- Click "Upload" from the alert message
Step 5. Verifying the package on IPFS
You will get an IPFS hash!
- Click the name of the folder
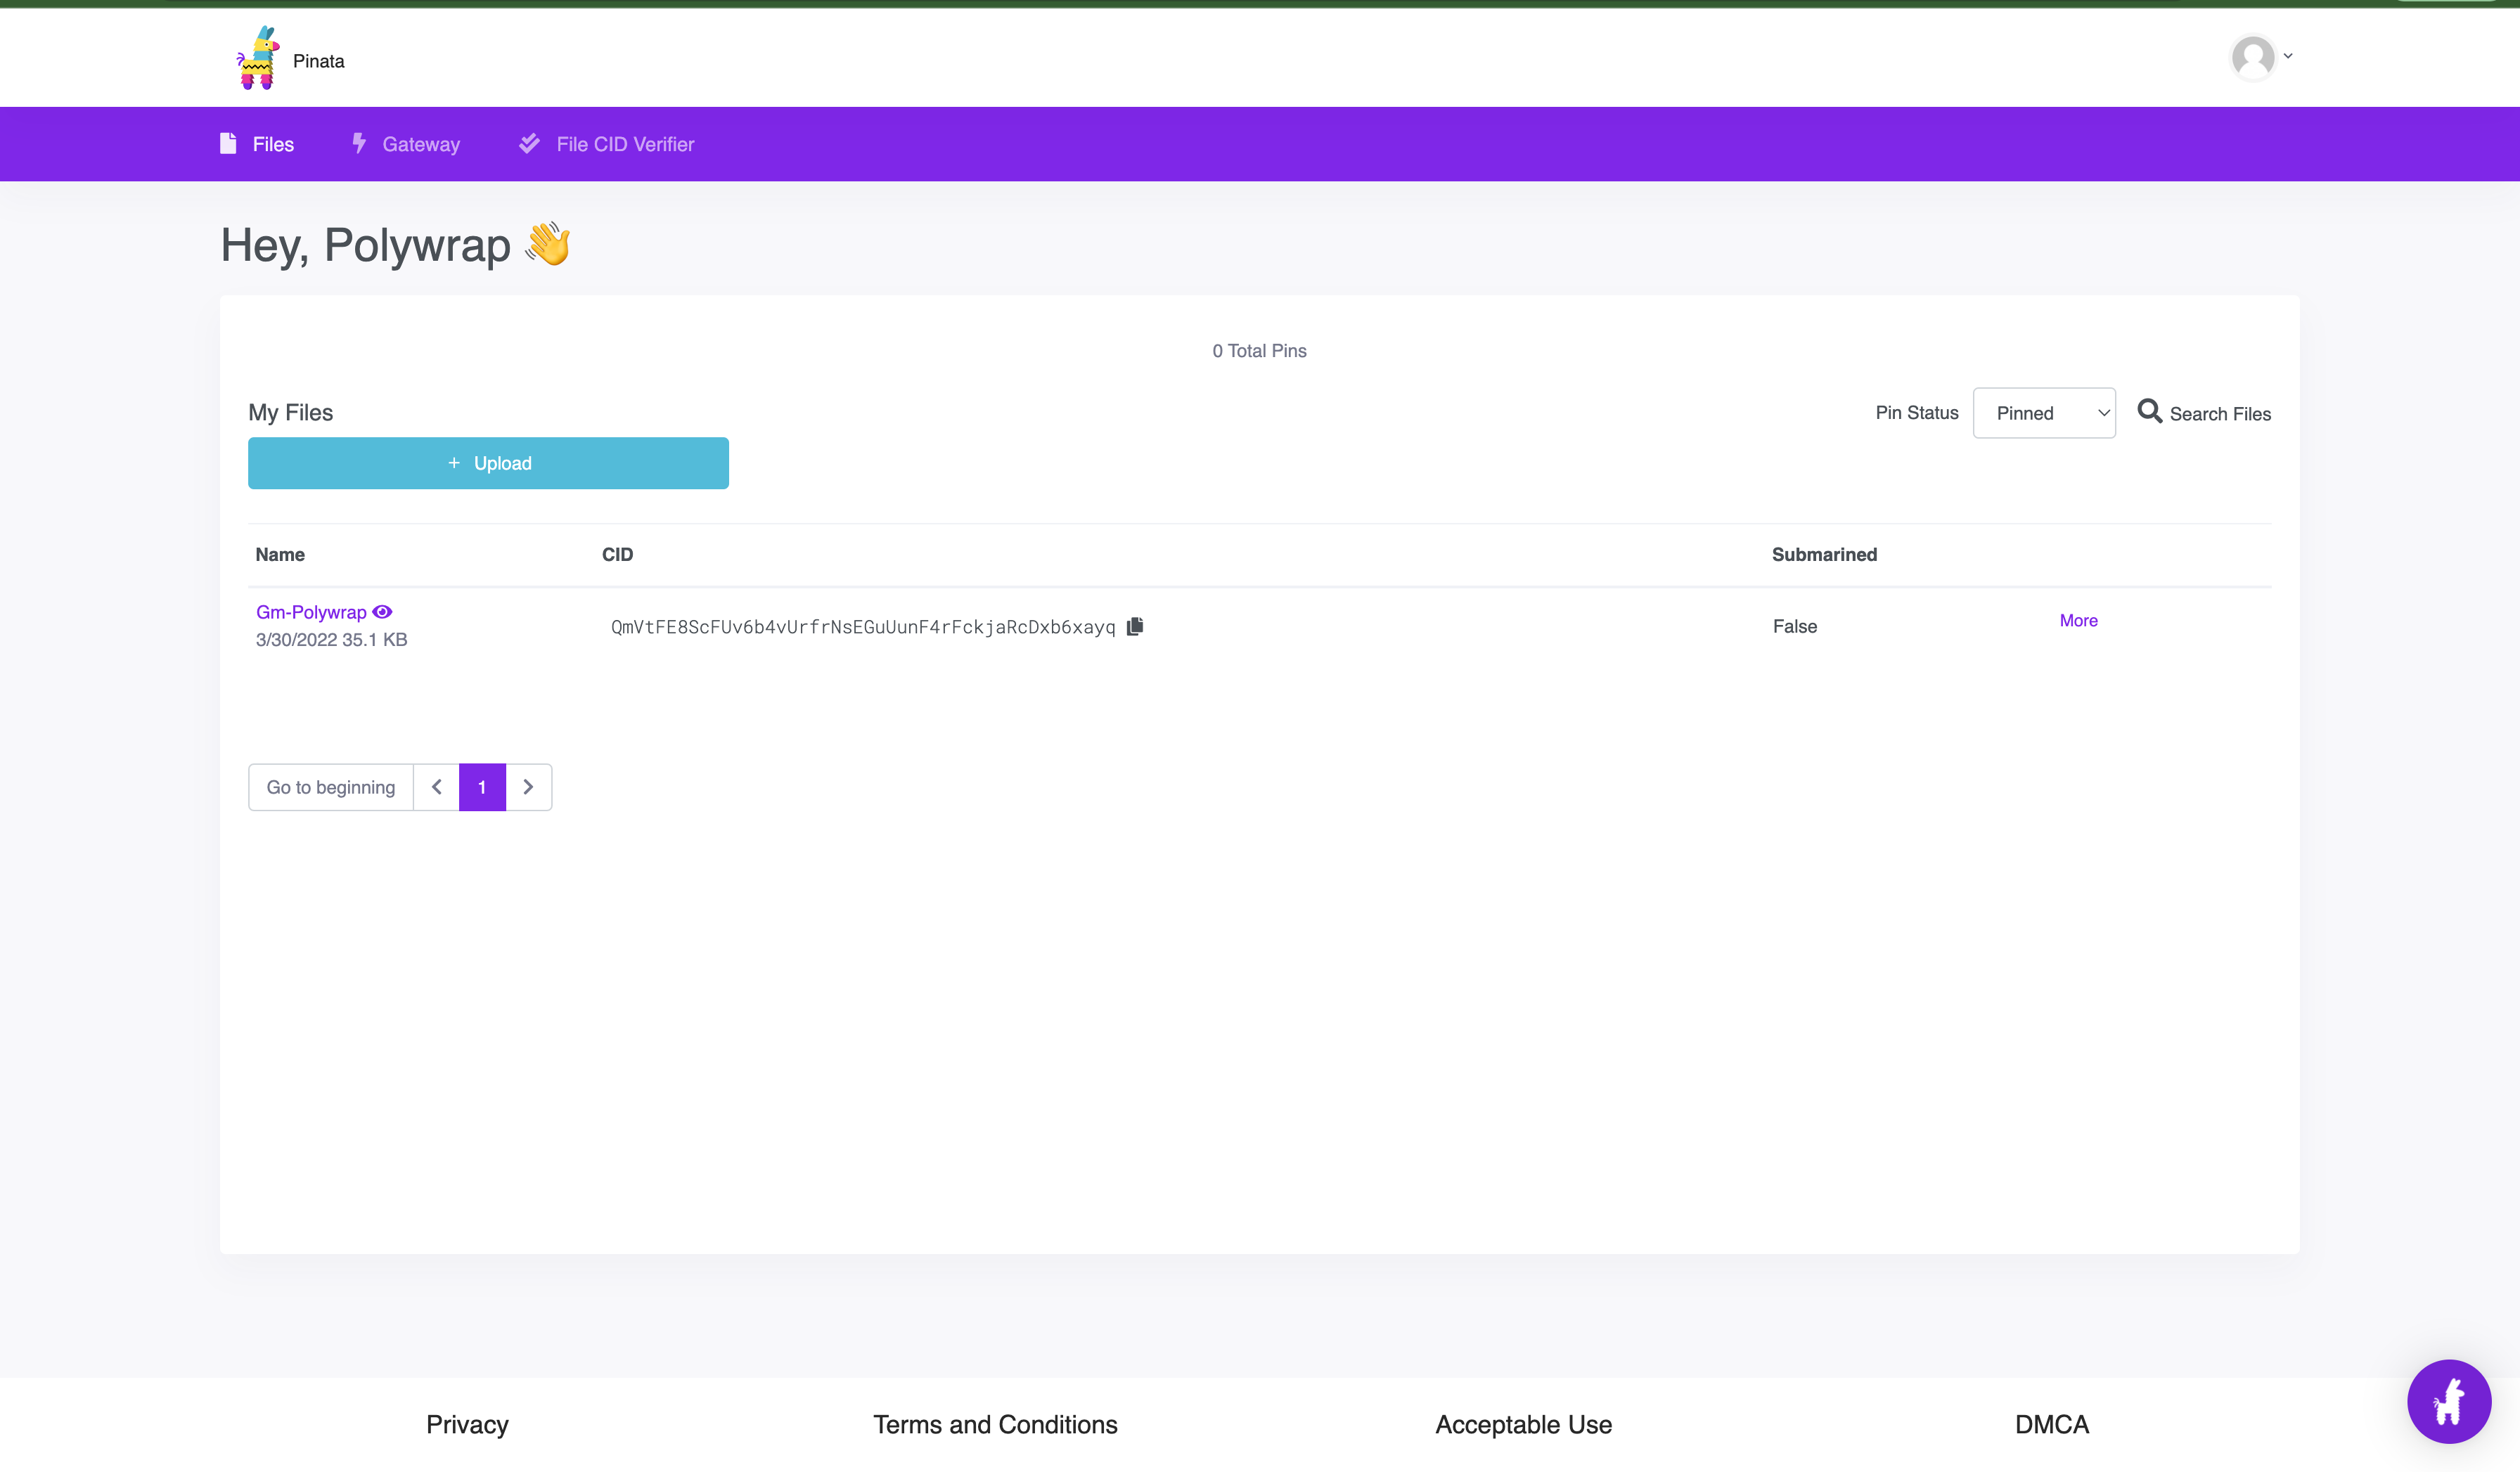
This will lead you to IPFS link: https://gateway.pinata.cloud/ipfs/QmVtFE8ScFUv6b4vUrfrNsEGuUunF4rFckjaRcDxb6xayq
Now that you have the IPFS hash located in the CID column in the pinata manager, you can use it as a value in the URI property of your Polywrap queries to access the functions in this wrap.
🎉 Congratulations 🎉 on deploying to Pinata!